Showing posts with label HTML. Show all posts
Showing posts with label HTML. Show all posts
Saturday, 10 May 2014
Saturday, 12 April 2014
Unordered List Example
Unordered list creates list with symbols like disc/bullet, circle or square. To create unordered list <ul> tag is used. Create list item using <li> tag. In <ul> tag type attribute is used to create symbol like disc , circle or square with list item. If you not specify type attribute then by default is disc/bullet symbol.
 |
| HTML - UL - Unordered List Example |
Friday, 11 April 2014
Sunday, 16 March 2014
HTML Image Tag Example
Hello friends, this tutorial is about HTML <img> (image) tag. To display/show image in the webpage then we have to use <img> tag of HTML. Here you can find all required attributes of <img> tag and some tips for image optimization.
Syntax:
"src" and "alt" attributes are important in image tag.
There are following important attributes list of image tag:
 |
| HTML Image Tag Example |
Syntax:
<img src="" alt="" />
"src" and "alt" attributes are important in image tag.
There are following important attributes list of image tag:
- src
- alt
- height
- width
To Read Table Tag. Click Here
src attribute:
Src stands for Source and contains value of image path.
For example, if your webpage is saved in some "xyz" directory/folder and image is also in same folder then you have to write following code to display image. Here "allcodetips.jpg" is a image file name, your image file name can be different.
Example:
<img src="allcodetips.jpg" />
If your webpage is saved in "xyz/" directory and image is stored in "xyz/img/" directory then you have to use following code:
Example:
<img src="img/allcodetips.jpg" />
alt attribute:
Alt attribute is second most useful attribute. Alt attribute contains text message and this text message is displayed when image is not display. In short when image is not possible to display at that time alt attribute's value is displayed.
Second use of alt attribute is SEO (Search Engine Optimization) because Search Engine crawler does not crawl images, so crawler crawls src and alt attributes' value.
So always use alt attribute for better Search Engine Optimization.
Example:
<img src="allcodetips.jpg" alt="All Code Tips" />
height attribute:
Height attribute specifies height of image. You can provide height value like 100, 250, 500, etc as your requirement.
Example:
<img src="allcodetips.jpg" alt="All Code Tips" height="250px" />
width attribute:
Width attribute specifies width of image. You can provide percent value to the width attribute like width="100%". You can also provide pixel value to the width attribute.
Example:
<img src="allcodetips.jpg" alt="All Code Tips" width="250px" />
Conclusion:
HTML image tag contains many other attributes, but above listed attributes are most common. You can use events in image tag using onmouseover, onclick, onmouseout, etc.
If you find any difficulty then comment below.
Saturday, 8 March 2014
Friday, 7 March 2014
How To Create Drop Down Menu In HTML
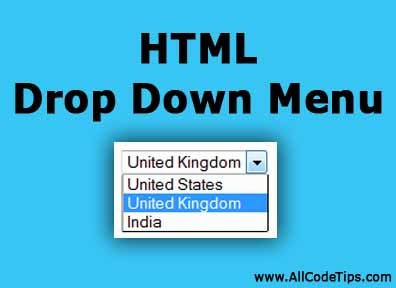
Here is a tutorial of how to create drop down menu in HTML (HyperText Markup Language). To create drop down menu you have to use two HTML tags that are <select> tag and <option> tag.
<select> tag is parent tag of <option> tag. Options can be specified using <option> tag. This drop down menu is used in city, country, etc list.
Let's first understand <select> tag then <option> tag.
<select> tag
<select> tag is parent tag for <option> tag. To create drop down menu, you have to first write <select> tag.
<select> tag has following useful attributes:
multiple attribute:
Multiple attribute is used to make drop down menu as multiple items can be selected.
For example
This attribute is available in all HTML elements and it is just name of drop down menu.
For example
Disabled attribute is used to make drop down disabled. We can not interact with disabled drop down menu.
For example
<option> tag is used to create options for drop down menu.
<option> tag contains two important attributes listed below:
selected attribute:
This attribute is used to select particular item/option from drop down menu.
For example
Value attribute is important for drop down menu. This value is passed to actioned page when form is submitted.
For example
 |
| HTML Drop Down Menu |
<select> tag is parent tag of <option> tag. Options can be specified using <option> tag. This drop down menu is used in city, country, etc list.
Read How To Create Textarea In HTML
Read How To Create Button In HTML
Read How To Create Radio Button In HTML
Read How To Create Checkbox In HTML
Read How To Create Table In HTML
Read How To Create Text and Password Fields In HTML
Read How To Create Button In HTML
Read How To Create Radio Button In HTML
Read How To Create Checkbox In HTML
Read How To Create Table In HTML
Read How To Create Text and Password Fields In HTML
Let's first understand <select> tag then <option> tag.
<select> tag
<select> tag is parent tag for <option> tag. To create drop down menu, you have to first write <select> tag.
<select> tag has following useful attributes:
- multiple
- name
- disabled
multiple attribute:
Multiple attribute is used to make drop down menu as multiple items can be selected.
For example
<form>
 <select multiple="multiple">
  <option>United States</option>
  <option>United Kingdom</option>
  <option>India</option>
    </select>
</form>
This attribute is available in all HTML elements and it is just name of drop down menu.
For example
<form>
 <select name="country">
  <option>United States</option>
  <option>United Kingdom</option>
  <option>India</option>
    </select>
</form>
Disabled attribute is used to make drop down disabled. We can not interact with disabled drop down menu.
For example
<form>
 <select disabled="disabled">
  <option>United States</option>
  <option>United Kingdom</option>
  <option>India</option>
    </select>
</form>
<option> tag is used to create options for drop down menu.
<option> tag contains two important attributes listed below:
- selected
- value
selected attribute:
This attribute is used to select particular item/option from drop down menu.
For example
<form>
 <select>
  <option>United States</option>
  <option selected="selected" >United Kingdom</option>
  <option>India</option>
    </select>
</form>
Value attribute is important for drop down menu. This value is passed to actioned page when form is submitted.
For example
<form>
 <select>
  <option value="US" >United States</option>
  <option value="UK" >United Kingdom</option>
  <option value="IN" >India</option>
    </select>
</form>
<form>
 <select name="country">
  <option value="US">United States</option>
  <option selected="selected" value="UK">United Kingdom</option>
  <option value="IN">India</option>
 </select>
</form>
Thursday, 6 March 2014
How To Create Textarea In HTML Form
This post discusses about how to create textarea in HTML form. <textarea> tag can be written inside the <form> tag and it is used for to get large text like address, resume, etc.
Syntax of textarea:
cols attribute:
This attribute is used to give number of columns to textarea. This attribute takes numeric value. cols is one of the important attribute of textarea tag.
For example:
dir attribute contains two values:
For example:
If textarea has disabled attribute then you can not interact with textarea.
For example:
This attribute is common attribute for all HTML elements. This attribute specifies name of textarea.
For example:
This attribute makes textarea as readonly that means you can not type anything inside textarea but you can select text and copy it.
For example:
This attribute is important attribute of textarea. This attribute makes number of rows to textarea.
For example:
This attribute specifies tab order of an element when you use tab key for navigation.
For example:
 |
| HTML textarea Example |
Read How To Create Button In HTML
Read How To Create Radio Button In HTML
Read How To Create Checkbox In HTML
Read How To Create Table In HTML
Read How To Create Text and Password Fields In HTML
Read How To Create Radio Button In HTML
Read How To Create Checkbox In HTML
Read How To Create Table In HTML
Read How To Create Text and Password Fields In HTML
Syntax of textarea:
<form>
 <textarea></textarea>
</form>
- cols
- dir
- disabled
- name
- readonly
- rows
- tabindex
cols attribute:
This attribute is used to give number of columns to textarea. This attribute takes numeric value. cols is one of the important attribute of textarea tag.
For example:
<form>
 <textarea cols="50">
  This is textarea
 </textarea>
</form>
dir attribute contains two values:
- ltr (left to right)
- rtl (right to left)
For example:
<form>
 <textarea dir="rtl">
  This is textarea
 </textarea>
</form>
If textarea has disabled attribute then you can not interact with textarea.
For example:
<form>
 <textarea disabled="disabled">
  This is textarea
 </textarea>
</form>
This attribute is common attribute for all HTML elements. This attribute specifies name of textarea.
For example:
<form>
 <textarea name="txtarea">
  This is textarea
 </textarea>
</form>
This attribute makes textarea as readonly that means you can not type anything inside textarea but you can select text and copy it.
For example:
<form>
 <textarea readonly="readonly">
  This is textarea
 </textarea>
</form>
This attribute is important attribute of textarea. This attribute makes number of rows to textarea.
For example:
<form>
 <textarea rows="3">
  This is textarea
 </textarea>
</form>
This attribute specifies tab order of an element when you use tab key for navigation.
For example:
<form>
 <textarea tabindex="1">
  This is textarea
 </textarea>
</form>
<form>
 Address:<br />
 <textarea cols="40" dir="ltr" rows="3" tabindex="1">
  Type Your Address
 </textarea>
</form>
Wednesday, 5 March 2014
How To Create Button In HTML
This post is about how to create button in HTML. There are many different methods of creating button. Some examples are given below but we talk only about <input type="button" />, <input type="submit" /> and <input type="reset" />
Using <input> tag example:
Let's understand following buttons:
Syntax of button:
Following are the most common attributes of <input type="button" />:
name attribute:
This attribute is available in all HTML elements. This is just name of button.
For example:
Specifies the tab order of an element when you use tab key for navigation.
For example:
Value attribute is used to display text on the button. If you not provide this attribute then button contains empty text. Use this attribute to set value like "Save", "Submit", "Update", etc.
For example:
Syntax of Submit button:
Below are the attribute list of submit button:
For example:
Syntax of Reset button:
These attributes are already discussed above in the <input type="button" /> tutorial.
For example:
 |
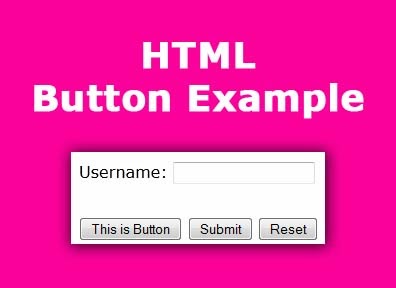
| HTML Button Example |
Read How To Create Radio Button In HTML
Read How To Create Checkbox In HTML
Read How To Create Table In HTML
Read How To Create Text and Password Fields In HTML
Read How To Create Checkbox In HTML
Read How To Create Table In HTML
Read How To Create Text and Password Fields In HTML
Using <input> tag example:
<form>
 <input type="button" />
</form>
<form>
 <button type="button" /> Click Me </button>
</form>
Let's understand following buttons:
- <input type="button" />
- <input type="submit" />
- <input type="reset" />
1. <input type="button" /> (Simple Button)
Syntax of button:
<form>
 <input type="button" />
</form>
- onblur
- onclick
- ondblclick
- onfocus
- onmouseover, etc
<form>
 <input type="button" onclick="my_method()" />
</form>
Following are the most common attributes of <input type="button" />:
- name
- tabindex
- value
name attribute:
This attribute is available in all HTML elements. This is just name of button.
For example:
<form>
 <input type="button" name="btn_save" />
</form>
Specifies the tab order of an element when you use tab key for navigation.
For example:
<form>
 <input type="button" tabindex="2" />
 <input type="button" tabindex="1" />
</form>
Value attribute is used to display text on the button. If you not provide this attribute then button contains empty text. Use this attribute to set value like "Save", "Submit", "Update", etc.
For example:
<form>
 <input type="button" value="Save" />
</form>
2. <input type="submit" /> (Submit Button)
Syntax of Submit button:
<form action="page2.php">
 <input type="submit" />
</form>
Below are the attribute list of submit button:
- name
- tabindex
- value
For example:
<form action="page2.php">
 <input type="submit" name="btn_submit" value="Submit Data" />
</form>
3. <input type="reset" /> (Reset Button)
Syntax of Reset button:
<form>
 <input type="reset" />
</form>
- name
- tabindex
- value
These attributes are already discussed above in the <input type="button" /> tutorial.
For example:
<form>
 <input type="reset" name="btn_reset" value="Reset Data" />
</form>
<form action="#">
     Username: <input type="text" name="uname" /><br /><br />
     <input type="button" name="btn_save" tabindex="1"
         value="This is Button"  />
        <input type="submit" name="btn_update" tabindex="2"
         value="Submit"  />
        <input type="reset" name="btn_reset" tabindex="3"
         value="Reset"  />
</form>
Tuesday, 4 March 2014
How To Create Radio Button In HTML
Hello friends, here is a descriptive tutorial of how to create radio button in HTML (HyperText Markup Language). This radio button creation tutorial contains all most common used attributs with example codes.
 |
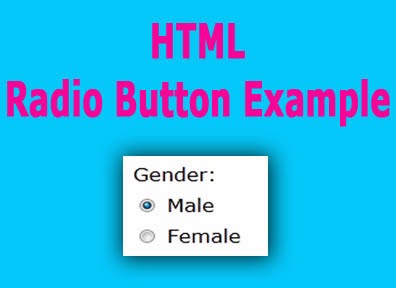
| HTML Radio Button Example |
Radio button tag can be written inside the <form> tag, so <form> tag is parent tag of radio button tag.
Here is the syntax of radio button creation.
Syntax of radio button:
checked attribute:
Checked attribute is used to check-mark radio button. By default radio button is not checked, to make by default checked use checked="checked".
For example:
To make radio button disable then use disabled attribute. We can not interact with disabled radio button.
For example:
This attribute is available in all HTML elements. Use of this attribute is to give name of particular element.
NOTE: In radio button name is important attribute. To make group of radio button then give same name to each radio button. If you give different name to each radio button then all radio button can be checked, but it is not nature of radio button. Only one radio button is selected at a time.
For example:
This attribute specifies tab order of an element when you use tab key for navigation.
For example:
Value attribute is used to set value for radio button. Set value is used in submitted page. In short, when you submit form than that value is passed to actioned page.
For example:
Read How To Create Checkbox In HTML
Read How To Create Table In HTML
Read How To Create Text and Password Fields In HTML
Read How To Create Table In HTML
Read How To Create Text and Password Fields In HTML
Here is the syntax of radio button creation.
Syntax of radio button:
<form>
 <input type="radio" />
</form>
- checked
- disabled
- name
- tabindex
- value
checked attribute:
Checked attribute is used to check-mark radio button. By default radio button is not checked, to make by default checked use checked="checked".
For example:
<form>
 <input type="radio" checked="checked" />
</form>
To make radio button disable then use disabled attribute. We can not interact with disabled radio button.
For example:
<form>
 <input type="radio" disabled="disabled" />
</form>
This attribute is available in all HTML elements. Use of this attribute is to give name of particular element.
NOTE: In radio button name is important attribute. To make group of radio button then give same name to each radio button. If you give different name to each radio button then all radio button can be checked, but it is not nature of radio button. Only one radio button is selected at a time.
For example:
<form>
 <input type="radio" name="gender" /> Male
 <input type="radio" name="gender" /> Female
</form>
This attribute specifies tab order of an element when you use tab key for navigation.
For example:
<form>
 <input type="radio" tabindex="2" />
 <input type="radio" tabindex="1" />
</form>
Value attribute is used to set value for radio button. Set value is used in submitted page. In short, when you submit form than that value is passed to actioned page.
For example:
<form>
 <input type="radio" value="male" />
 <input type="radio" value="female" />
</form>
<form>
 Gender: <br />
 <input type="radio" name="gender" tabindex="1"
  value="male" checked="checked" /> Male
 <br />
 <input type="radio" name="gender" tabindex="2"
  value="female" /> Female
</form>
Saturday, 1 March 2014
Friday, 28 February 2014
HTML Checkbox Example
HTML checkbox is used for multiple item selection. Checkbox looks like square box.This tutorial gives information about attributes of checkbox element with example code.
Syntax of checkbox:
checked attribute:
Checked attribute is used for whether checkbox is checked or not. By default checkbox is not checked. To make checkbox checked provide checked="checked".
For example:
This attribute is used for to make checkbox disable. User can not interact with disabled checkbox.
For example:
This attribute is common attribute for all element. This is just name of particular object/element. You can give any name without special characters and white spaces.
For example:
This attribute is also common attribute and available in all HTML elements. It specifies tab order of an element when you use tab button/key for navigation.
For example:
value attribute:
Value attribute is important attribute of checkbox. This attribute sets value and it is used when you access value in submitted page.
For example:
Video Tutorial:
How To Create HTML Table
 |
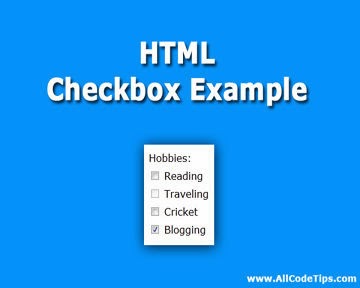
| HTML Checkbox Example |
Syntax of checkbox:
<form>
 <input type="checkbox" />
</form>
- checked
- disabled
- name
- tabindex
- value
checked attribute:
Checked attribute is used for whether checkbox is checked or not. By default checkbox is not checked. To make checkbox checked provide checked="checked".
For example:
<form>
 <input type="checkbox" checked="checked" />
</form>
This attribute is used for to make checkbox disable. User can not interact with disabled checkbox.
For example:
<form>
 <input type="checkbox" disabled="disabled" />
</form>
This attribute is common attribute for all element. This is just name of particular object/element. You can give any name without special characters and white spaces.
For example:
<form>
 <input type="checkbox" name="cricket" />
</form>
This attribute is also common attribute and available in all HTML elements. It specifies tab order of an element when you use tab button/key for navigation.
For example:
<form>
 <input type="checkbox" tabindex="2" />
 <input type="checkbox" tabindex="1" />
</form>
value attribute:
Value attribute is important attribute of checkbox. This attribute sets value and it is used when you access value in submitted page.
For example:
<form>
 <input type="checkbox" value="cricket" />
 <input type="checkbox" value="badminton" />
</form>
<form>
     Hobbies:<br />
     <input type="checkbox" name="reading" value="reading"
         tabindex="1" /> Reading<br />
        <input type="checkbox" name="traveling" value="traveling"
        tabindex="2" disabled="disabled" /> Traveling<br />
        <input type="checkbox" name="cricket" value="cricket"
         tabindex="3" /> Cricket<br />
        <input type="checkbox" name="blogging" value="blogging"
         tabindex="4" checked="checked" /> Blogging
</form>
Video Tutorial:
How To Create HTML Table
Sunday, 16 February 2014
How To Create Table In HTML
1. What is Table In HTML?
Table is a collection of rows and columns. It is very easy to create table in HTML. To create table <table> tag is used. If we consider student table then some fields/columns of student table are Roll No, Name, Contact No, City, etc. Table is used to display records of students, employee, products, etc in tabular format. Following image contains example of student table:
 |
| Create HTML Table |
Subscribe to:
Comments
(
Atom
)


