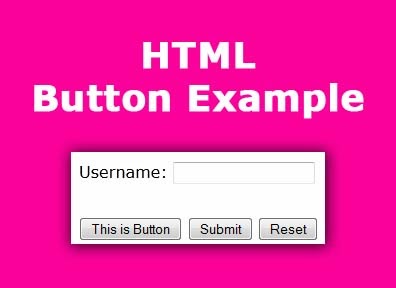
This post is about how to create button in HTML. There are many different methods of creating button. Some examples are given below but we talk only about <input type="button" />, <input type="submit" /> and <input type="reset" />
Using <input> tag example:
Let's understand following buttons:
Syntax of button:
Following are the most common attributes of <input type="button" />:
name attribute:
This attribute is available in all HTML elements. This is just name of button.
For example:
Specifies the tab order of an element when you use tab key for navigation.
For example:
Value attribute is used to display text on the button. If you not provide this attribute then button contains empty text. Use this attribute to set value like "Save", "Submit", "Update", etc.
For example:
Syntax of Submit button:
Below are the attribute list of submit button:
For example:
Syntax of Reset button:
These attributes are already discussed above in the <input type="button" /> tutorial.
For example:
 |
| HTML Button Example |
Read How To Create Radio Button In HTML
Read How To Create Checkbox In HTML
Read How To Create Table In HTML
Read How To Create Text and Password Fields In HTML
Read How To Create Checkbox In HTML
Read How To Create Table In HTML
Read How To Create Text and Password Fields In HTML
Using <input> tag example:
<form>
 <input type="button" />
</form>
<form>
 <button type="button" /> Click Me </button>
</form>
Let's understand following buttons:
- <input type="button" />
- <input type="submit" />
- <input type="reset" />
1. <input type="button" /> (Simple Button)
Syntax of button:
<form>
 <input type="button" />
</form>
- onblur
- onclick
- ondblclick
- onfocus
- onmouseover, etc
<form>
 <input type="button" onclick="my_method()" />
</form>
Following are the most common attributes of <input type="button" />:
- name
- tabindex
- value
name attribute:
This attribute is available in all HTML elements. This is just name of button.
For example:
<form>
 <input type="button" name="btn_save" />
</form>
Specifies the tab order of an element when you use tab key for navigation.
For example:
<form>
 <input type="button" tabindex="2" />
 <input type="button" tabindex="1" />
</form>
Value attribute is used to display text on the button. If you not provide this attribute then button contains empty text. Use this attribute to set value like "Save", "Submit", "Update", etc.
For example:
<form>
 <input type="button" value="Save" />
</form>
2. <input type="submit" /> (Submit Button)
Syntax of Submit button:
<form action="page2.php">
 <input type="submit" />
</form>
Below are the attribute list of submit button:
- name
- tabindex
- value
For example:
<form action="page2.php">
 <input type="submit" name="btn_submit" value="Submit Data" />
</form>
3. <input type="reset" /> (Reset Button)
Syntax of Reset button:
<form>
 <input type="reset" />
</form>
- name
- tabindex
- value
These attributes are already discussed above in the <input type="button" /> tutorial.
For example:
<form>
 <input type="reset" name="btn_reset" value="Reset Data" />
</form>
<form action="#">
     Username: <input type="text" name="uname" /><br /><br />
     <input type="button" name="btn_save" tabindex="1"
         value="This is Button"  />
        <input type="submit" name="btn_update" tabindex="2"
         value="Submit"  />
        <input type="reset" name="btn_reset" tabindex="3"
         value="Reset"  />
</form>


0 comments :
Post a Comment